• Home
  • About Us
  • Toolkit
  • Archives
  • Advertise
  • Privacy Policy

Kids Ain't Cheap

But They Sure Are Worth It

  • Parenting
    • Baby Stuff
    • Books and Reading
      • Aesops Fables
      • Comic Books
    • Education
    • Family Time
    • Green Living
    • Growing Up
    • Healthy Living & Eating
    • Holidays
    • Parenting
    • Random Musings
    • Shopping
    • Stuff to Do
  • Money
  • Product Reviews
    • Books and Magazines
    • Discount Sites
    • Furniture
    • House Keeping
    • Reviews News
    • Toys and Games
  • Contact Us
  • Our Editorial Commitment
  • Search

Little Girl Can’t Let Go as Father Prepares for Deployment

June 8, 2011 | Leave a Comment

Wow, what a powerful and incredibly sweet picture.  The solder next to the little girl is a local.  He lives and raises his family in my part of the country.  When the local paper ran this picture, I just about cried.  It’s so sweet and powerful.  Having a little 4 year old girl in formation is against Army regulations but not a single man there was strong enough or heartless enough to tell that little girl she couldn’t stand by her fathers side as he prepared to deploy overseas.  You can read the full article in my local paper here

Salute.

Doesn’t a story like this just warm your heart? Do you know of any other examples like this?

Brian
Brian

Brian is the founder of Kids Ain’t Cheap and is now sharing his journey through parenthood.

 
Email • Google + • Facebook • Twitter

Filed Under: Family Time, Random Musings Tagged With: Daughter, Deployment, Family, Soldier

Spend Less on Your Memorial Day BBQ

May 22, 2011 | Leave a Comment

Family BBQ
Curtesy of Pixabay

Before I begin talking about barbecuing – I feel it is important to note – that Memorial Day– which was once known as Decoration Day – is a time to honor all those brave men and women who have lost their lives serving our great country. The first Memorial Day was observed on May 30th 1868, when flowers were placed on the graves of Union and Confederate soldiers — at Arlington National Cemetery.

For many people, Memorial Day is also when they spend some good quality time — with friends and family. The holiday is viewed as the official kick-off of grilling season. Since Memorial Day provides a good number of us with a long weekend, this seems like the perfect time to get friends and family together — to eat, play and enjoy each other’s company. Like many Americans — you may be thinking of planning a Memorial Day BBQ. However, sometimes budget restrictions can make you feel like you can’t have people over — because you simply can not afford it.

Fear not! I have some great ideas (if I do say so myself) on how you can plan a fun and festive Memorial Day BBQ — and spend less.

Tip #1: Save on Invites

It’s always nice to send invites but you don’t have to go to all the trouble – and expense – of buying invitations and mailing them out. In today’s world, there are so many ways – of letting people know – about the get-togethers we are planning! Evite is one of my favorites! They have great invitations, for just about any occasion. Using Evite is not only frugal — but eco-friendly as well. You probably wouldn’t send wedding invites out this way, but for birthday parties – and other informal get-togethers – it is just perfect! 🙂

If most of your friends are on Facebook— there is a great event application there as well. With Evite and Facebook events — it also makes it super simple for your guests to RSVP and for you to send out reminders. This will help to ensure that you get an accurate head count, so you can plan accordingly.

  • In the invite, remind people to wear their sunscreen and to bring their bug repellent. These are two very important things to have for any BBQ!

Tip #2: Save on Food

Hosting a BBQ potluck is another great way to save money on your Memorial Day celebration. If your friends and family are anything like mine, they are very thoughtful and always ask – or insist – on bringing something to the party. This is not only a kind gesture and money saver — it also helps take some of the stress of planning, off of your shoulders. The less food you have to prepare — the more time you’ll have to spend on other things, so you can enjoy the BBQ along with everyone else.

Keep it simple. Your guests don’t expect you to do anything elaborate. Grilling up burgers, hot dogs, and sausages — are just perfect for an event like this. If you can find a good deal on ribs, fish or other cuts of meat go for it — but you certainly don’t have to.

Tip #3: Save on Decorations

Do decorations from parties past — linger in your garage, attic, or some other storage place? Awesome! Get them out, dust them off and put them to good use. There is no law – that I am aware of anyway – which states that you can not re-use decorations. While it might not be appropriate to use your child’s 1st birthday banner, there are other decorations that might work beautifully — even last year’s 4th of July decor will work quite nicely.

If you don’t have any old decorations to use, head you your local dollar store as see what they have on hand. If you don’t want to do that, you can just buy a fun table cloth and put some fresh flowers out — and you’ll be all set!

Tip #4: Save on Entertainment

You don’t have to spend a lot to keep your guests entertained. Most people like to just sit around and chat — but if you want to add some other activities for your guests to do, there are a few ways to do this.

  • Get out the board games or even a deck of cards and have some fun.
  • Potato sack races? Why sure — that sounds like a fine idea!
  • Host a scavenger hunt. This is great for kids of all ages!
  • Do a good ol’ fashion egg toss. Hard boil the eggs if you like — or don’t hard boil them, this adds a little more drama to the competition 🙂
  • Flag football! Just cut up some old t-shirts – or towels – for the flags and away you go!
  • You can play croquet, volleyball, Frisbee or badminton depending on how much space you have. If don’t have these games, a friend or family member might.

What are you planning this Memorial Day weekend? Do you have some other suggestions on how people can save on these types of parties? I’d love to hear them!!!

Brian
Brian

Brian is the founder of Kids Ain’t Cheap and is now sharing his journey through parenthood.

 
Email • Google + • Facebook • Twitter

Filed Under: Family Time, Holidays, Money and Finances Tagged With: BBQ, Holidays, Memorial Day, Parties, Saving Money

Super Simple {and really fun} Nature Craft

May 13, 2011 | 3 Comments

Leaf for nature craft
curtesy of FreeFoto.com

Yes, it’s me again — the reluctant crafter. If you have been reading this blog for awhile, then you know I have publicly admitted that I am not one of those wonderfully crafty mommies. I do my best — and my kids seem okay with my limited ability, in this area of Mommy-hood. However, they really do love crafts (even the really simple kind), so I often peruse crafting websites trying to find easy – and not terribly messy – things to do with the kids.

One Saturday morning, I was watching TV and there was a craft show on. It was all centered around fun things to do with the kids. The host of the show, is like the Macgyver of making toys for kids, by re-purposing just about anything (milk cartons, egg cartons, cans, butter containers, broken wooden handles, etc.). Some of the things she made — the boys would have broken faster than it took to actually make. However, she also had some annoyingly creative ideas as well. There was one thing she made that stuck with me and I just tried it the other day.

Nature Walk Craft

I am always looking for fun things to do with the kids — and ways to provide opportunities, to help them learn about the world around them. Admittedly, some days I am better at this than others. On this particular day, I was running out of things to do with the kids, they were wanting to do a craft (I couldn’t talk them into doing watercolors again) and we all really needed to get out for a walk. It was almost lunch/nap time though, so I didn’t have a lot of time to put anything together but I knew I had to think of something — and fast.

That is when this craft came to mind. It’s simple:

What you need:

  • Sandwich bags
  • Yarn
  • A hole punch
  • Construction paper
  • Glue
  1. Take the sandwich bag and punch a hole at the top on either side
  2. Cut a piece of yarn and tie each end into a hole — this makes a collection bag. (The boys wore their collection bags during the walk)
  3. Go on a nature walk. This can be as simple as walking through your own backyard, neighborhood, local park, or taking a hike.
  4. Let the kids look at discover all the things they see. They will stop and examine items and put things their bags. I honestly thought the boys would stuff anything they could see in their bags, but they were pretty selective.
  5. After you are done with your walk — get the construction paper out. You can either let the kids glue their items on their paper, or (this is my favorite method) squeeze out a bunch of Elmer’s glue onto the paper and let the kids glue their items on. They did this while I was making lunch.
  6. Let Dry the picture dry.

This was such an easy thing to do, and I really had no idea how much the kids would love it. The whole time we were on our walk A. was singing “We are going on a nature walk. We’re going on a nature walk.” It was so cute. It was also, the first thing the boys told their Dad about when he got home. They had a blast, got some fresh air, good exercise, and made a craft like they wanted to.

It’s the simple things that make life so sweet. My kids have definitely taught me that! 🙂

Do you use crafts to make everyday experiences memorable? What other nature crafts can you recommend?

Brian
Brian

Brian is the founder of Kids Ain’t Cheap and is now sharing his journey through parenthood.

 
Email • Google + • Facebook • Twitter

Filed Under: Family Time Tagged With: Crafts, Nature, Nature Walks, Outdoors

Happy Mother’s Day!

May 9, 2011 | Leave a Comment

E-wishes for Mother's DayHere in Manila, we have some holidays that are decidedly Western and Mother’s Day is one of them.  It is made an even bigger event because I believe Filipino culture places a heavy emphasis on the place, value, and importance of the mother in a family.  On Mother’s Day, you will see more traffic than normal (and that means a lot of traffic overall!) going to malls, parks, and restaurants.  You will normally see heartwarming commercials with tear-inducing montages to mothers of all kind on TV at the beginning of the month and the bookstores will likely be festooned with Balloons and poems to Moms.  Needless to say, it is a fairly big day.

Celebrating Mother’s Day as a Single Mom with Young Children

Since I became a mom, I like doing something just a little special to celebrate.  It is said here that this is a day when Mom’s are treated like Queens, chores suspended for a day, meals cooked and served to them, etc. but since my kids are still young, I normally get lots of hugs, kisses, and ‘I love you very much, mommy’ comments rather than the other stuff—which is fantastic still, in my opinion.  So, I orchestrate the ‘celebrations’ and this usually involves just a special meal and/or a trip somewhere not normally visited with the kids.

This year, I decided to bake a chocolate cake. You may be scratching your head wondering why this is different or special. Well, it is so because 1.  I have never baked a cake from scratch, even when I used to bake and sell cupcakes and bars.  2.  Since I have taken on single parenting, I have had very little time to do any kind of baking.

I decided to try this traditional cake because I wanted to know how to make a cake that could be a staple for celebrations.  I found a seemingly yummy recipe online and decided to try it out.  Here it is.

Moist Chocolate Cake:

Chocolate Cake:

  • 4 ounces unsweetened chocolate
  • 1/3 cup unsweetened coca powder (not Dutch-processed)
  • 1 cup boiling water
  • 2 1/4 cups all purpose flour
  • 2 teaspoons baking powder
  • 1 teaspoon baking soda
  • 1/4 teaspoon salt
  • 1 cup (226 grams) unsalted butter, room temperature
  • 2 cups (400 grams) granulated white sugar
  • 3 large eggs
  • 2 teaspoons pure vanilla extract
  • 1 cup (240 ml) milk

Frosting:

  • 5 ounces (140 grams) unsweetened chocolate, chopped
  • 1/3 cup (80 ml) milk
  • 1/2 cup (113 grams) unsalted butter, softened and cut into pieces
  • 4 pounds (1 pound/ 454 grams confectioners (powdered or icing) sugar, sifted to remove lumps
  • 1/8 teaspoon salt
  • 2 teaspoons pure vanilla extract

Chocolate Cake:

  1. Preheat oven to 350 degrees F (177 degrees C) and place rack in center of oven. Butter, or spray with a nonstick vegetable spray, and line with parchment paper, two – 9 x 2 inch deep (23 x 5 cm) round baking pans.
  2. In a stainless steel or heatproof bowl place the chopped unsweetened chocolate (baking, plain chocolate) and cocoa powder (natural, not Dutch processed ones). Pour the boiling water over the chocolate and cocoa powder and stir until they have melted. Set aside to cool while you make the batter.
  3. In a separate bowl, whisk to combine, the flour, baking powder, baking soda, and salt.
  4. In the bowl of your electric mixer, or with a hand mixer, beat the butter until smooth and creamy. Gradually add the sugar and continue beating until the mixture is fluffy (this will take about 3-5 minutes).
  5. Add the eggs, one at a time, mixing well after each addition. Make sure to smell the eggs and to check that they are not spoiled before adding them to the mixture or you will need to redo everything, and get and measure out a new set of ingredients. Scrape down the sides of the bowl as needed.
  6. Add the vanilla extract and melted chocolate mixture and beat to combine.
  7. Add the milk and flour mixtures in three additions, beginning and ending with the flour mixture. Beat only until the ingredients are incorporated.
  8. Divide the batter evenly between the two prepared pans and smooth the tops. Bake for about 35 – 40 minutes or until a toothpick inserted in the center comes out clean and the tops spring back when lightly pressed.
  9. Remove from oven and place on a wire rack to cool for about 10 minutes.
  10. Then remove the cakes from their pans and cool completely on a greased wire rack before frosting.

Frosting:

  1. Melt the chopped chocolate in a stainless steel bowl placed over a saucepan of simmering water. Remove from heat and let cool.
  2. Then place the melted chocolate, milk, confectioners’ sugar, salt, and vanilla extract in the bowl of your electric mixer, fitted with the paddle attachment. (Alternatively, you can use a hand mixer.) Add the pieces of softened butter and beat on low speed for about 2 minutes. When the frosting starts to come together increase the speed to medium and beat for about 2 to 3 minutes or until smooth. Scrape down the sides of the bowl with a rubber spatula. Increase the speed to high and beat the frosting for 1 – 2 minutes more or until it is of spreading consistency. If necessary, add more milk or sugar.

To Assemble:

  1. Place one layer of cake, top side down, on your serving plate and cover with a layer of frosting.
  2. Then place the second layer of cake, top side down, onto the first cake layer and then frost the top and sides of the cake with the remaining frosting.
  3. Can garnish with fresh fruit or shaved chocolate

It was tough getting back to the preciseness of baking after being out of baker’s mode for a long time but it was cool to see the cake come together.  The finished result was quite good as well. I wish I had taken a picture to showcase my first attempt but the idea popped into my mind after half of the cake had been eaten so…next time.  I intend to make it again at the end of the month for my birthday and, seeing as I have tried it before, I expect it to look better and to be able to whip it up faster.

What do you do on Mother’s Day?

Catherine
Catherine

Catherine is a first time momma to a rambunctious toddler. When she isn’t soaking up all that motherhood has to offer, you can find her blogging over at Plunged in Debt where she chronicles her and her husbands journey out of debt. You can also follow her on Twitter.

plungedindebt.com

Filed Under: Family Time Tagged With: Chocolate Cake, Mothers Day, Recipe

Saving Money on Big Family Events

May 6, 2011 | Leave a Comment

Bridal Shower cupcake
Photo by Anafuji on DeviantArt

Well my daughters wedding shower was a huge success! We all worked hard to have things go off without a hitch and we had enough food for double the amount of people that were invited. I think people took home more than they actually ate at the shower.

How to save on a bridal shower

Having a big event like a double bridal shower can also be very expensive but there are things that can be done to help save.

  • Make your own invitations. K and I bought the blank invitations at the local large craft supply store. We were EXTREMELY lucky because we have a close friend who loves to make these things. I spent about an hour on the computer and couldn’t get the things lined up right. After about an hour of me trying then breaking out in a cold sweat K took over and that didn’t go so well. So in panic we called a friend.
  • Buy bulk items that are not perishable long before the date. If you can hit the sales even better. Store it away and keep a list handy so that you know what you have and still need.
  • Breathe!
  • Put cash aside for the “little” things that may be needed last minute.
  • Breathe!

Last but not least just remember to stay as relaxed as possible. These events can be very stressful and Moms get VERY tired. After it was all done and over and the kids were happy we are happy with the way it turned out.

The day before the wedding shower was the Royal Wedding. Did I watch? Oh yes, I did! I have a daughter getting married in August. Did I get  emotional all by myself? You betcha! Oh, and Christie, I was thinking about you too. J

Want to know my last words while watching the wedding on my television? If the royal family can do it well then I can too!

Have you ever organized a bridal shower? How did you save money on it?

Brian
Brian

Brian is the founder of Kids Ain’t Cheap and is now sharing his journey through parenthood.

 
Email • Google + • Facebook • Twitter

Filed Under: Family Time, Money and Finances Tagged With: Bridal Shower, Family Events, Fun Activities, Gifts, Saving Money

3 Summertime Activities for Kids that Cost Almost Nothing

April 23, 2011 | Leave a Comment

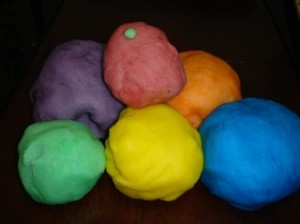
Homemade playdoughIt’s about that time of the year again when the sun is shining the brightest and hottest and kids of all sizes and ages are taking out their swim gear, bikinis, board shorts and goggles. In a tropical country, this may be a funny thing to hear but believe it or not, it is not always summertime in the Philippines. Yes, there are basically two seasons- wet and hot, but around this time of the year (March-May) the sun shines the brightest, school is out, and the kids are raring to be out of the house.

For my kids, the significance of summer vacation has not really hit home yet. They are preschoolers so school is a wonderland of books, crafts, stories, and songs. This is not yet that tough institution created to make knowledgeable and skilled individuals. This is still that enjoyable break from the possible monotony of home, a place to see friends and to talk to older, wiser, people who have so many fun ideas they want to implement. The challenge for me at this time of the year then, is coming up with creative ways to occupy the kids that are also informative and budget-friendly.

The fact that they are not yet so into going out of town to the beach or nagging me to go take that six hour derive to the mountain province that is a popular destination during summertime is a great thing because this means I have the freedom to think up things that are not expensive. So, here are the things I’ve come up with so far.
The old-fashioned games of kids

Remember way back when, when there were no Nintendo’s or PS3’s or X-boxes or Wii’s? Yes, there was a time before Atari decided to change it all for kids forever. During these times, the TV was just a box to watch a show on; Or a movie on Betamax or VHS. Back then, kids took their trusty bike’s or roller blades, or if they didn’t have either, a rock and a piece of chalk, and could pass the time in joyful, gleeful, outdoor play.

My favorite outdoor games were hopscotch, Chinese garter, tag, and hide and seek. I really think there is a lot to be said about these games and about outdoor play in general. I really believe it strengthens the kids physically, gets them in touch with nature, and really builds more character. Plus, the great thing about this is that there are so many places to go that are free. You can take you pick of parks, football fields, picnic areas, or even the handy sidewalk right outside your house. I have so many memories of meeting friends for outdoor play and I really am thrilled that my kids can experience the same thing today. Of course, they still want their Wii but I can hold off for some time on that still.

Making clay from scratch for play inside or outside

I loved Play dough when I was a kid. Now, before anyone starts to say I am transferring what I liked to my kids and I am ignoring what THEY like, know that they do really love play dough themselves. In fact, at times when I have to take them out to stay with generous friends while I do an errand or a job, I pack a jar of play dough each and that keeps the super occupied, and super sociable with other kids as well. The thing is though, that buying jars and jars of Play dough builds up in expense. It is a good thing that there is a way to make play dough from scratch. This way, you will always have play do when you need it and the kids can get in on the fun as well as this version is a non-cook one. Here it is;

No-Cook Play Dough recipe

Ingredients
  • 1 cup salt
  • 1 cup flour
  • 1 tablespoon cooking oil
  • 7-8 drops of food coloring
  • Water
Step by Step Method
  1. Mix the flour and salt.
  2. Add oil and food coloring to water.
  3. Add water until desired consistency is reached.
  4. Mix well.

Storing the No cook Play Dough

This play dough will keep for about 1 week if kept in a sealed plastic bag or container and slightly longer if stored in the refrigerator.

“Cooked” Play dough recipe

If you want to have Play dough that lasts longer, and you don’t mind making this yourself, here is a recipe for ‘cooked’ play dough;

Ingredients
  • 1 cup flour
  • 1/2 cup salt
  • 2 teaspoons Cream of Tartar
  • 1 cup water
  • 1 teaspoon cooking oil
  • 7-8 drops of food coloring
Step by Step Method
  1. Mix the flour and salt.
  2. Add the cream of tartar, water, and oil.
  3. Add some food coloring.
  4. Mix well.
  5. Cook over medium heat until ingredients form a ball. This process almost automatically forms a ball of the dough on the stove and its not to hot to touch. (Does not take more than a minute on stove).
  6. Turn out and knead until smooth, about 1 minute, and let it cool.

Storing Play Dough

This play dough recipe will make play dough that will keep for at least two months if kept in a sealed plastic bag or container and longer if you store it in the refrigerator.

Play dough can be used for so many creative activities inside and outside the house. You can even think of this as combining point number one and this points. In a nutshell, the material here is supposed to be something used for learning and fun during summertime downtime.

Cook

I am so impressed by the Junior Masterchef show from Australia. The youngest contestant was 8 years old! And these kids made real good dishes! Not your simple boiled egg. These were dishes with French names and showing a lot of technique.

Now, my kids loved the show as well and now they want to be chefs as well. This is great. In my country, the kids used to be taught how to cook very young as they were tasked to help their moms prepare meals. This also came from the fact that families were so much bigger then. My grandmother had nine kids and so my mom learned how to cook when she was 7. I know my kids are a couple of years too young for serious cooking but helping out in preparing dishes and helping me when baking is something they can do, and have done, and really enjoy at that.

If you already bake a lot then there is no additional expense. In fact, since you already cook anyway, the bonus here is that you have little helpers. Just be careful that you cook simple dishes when you involve them and always take care around the oven. This will surely keep them occupied for some hours during summertime.

So far, these are the things I have come up with. I am sure there are heaps more ideas there for summertime activities that are learning experiences and budget friendly as well.

What are your ideas for free summertime activities?

Brian
Brian

Brian is the founder of Kids Ain’t Cheap and is now sharing his journey through parenthood.

 
Email • Google + • Facebook • Twitter

Filed Under: Family Time, Stuff to Do Tagged With: Cooking, Fun Activities, Games, Outdoor Play, playdough, Summer

Seeing Spring Through Children’s Eyes

April 20, 2011 | Leave a Comment

Spring Flowers
Picture from: B. Monginoux / Landscape-Photo.net (cc by-nc-nd)

As much as I want the warm weather my kids want it more. I love to see how excited they get when the bikes are being pulled out and they want to be off and riding. My kids have always been the outside type and the older they get the more they love the outdoors.

I was brought up the same way. Living in the country on a farm I had to be outside whether I wanted to be or not when the animals needed to be taken care of. In the summer there was no such thing as hanging out on the couch and watching television unless it was really raining.

The joys of spring

Nature has a way of having us see things differently. Being outside and watching how fast the trees are budding and the grass actually turns green and grows is amazing. Doing yard work can be exhausting but at the end of the day just seeing what has been accomplished gives us a good feeling.

Spending time outside in the warm weather with our kids doesn’t even cost anything. Just sitting and talking or if the kids are younger blowing bubbles or drawing with chalk costs next to nothing. Being able to see the little bugs like the bees out and about boosts our spirits and makes us smile and tired all at the same time. I find it breathtaking at times how my kids see things that we adults seem to overlook. That one little blade of grass growing in the pavement..seriously? How many of us adults would have noticed? The sun warms us just about as much as our kid’s smiles and enthusiasm.

At the end of the day when it begins to cool we all go inside and clean up. We have dinner and everyone is full and happy. The thing is we all had a great stress free day and we are all content and happy. Total cost? The yard had to give up some dirt for my kids.

Are you and your children ready for spring?

Brian
Brian

Brian is the founder of Kids Ain’t Cheap and is now sharing his journey through parenthood.

 
Email • Google + • Facebook • Twitter

Filed Under: Family Time, Stuff to Do Tagged With: Nature, Outdoors, Playing, spring

Egg Carton Garden — Update

April 16, 2011 | 2 Comments

Seedling in an egg cartonI promised you all an update on our egg carton seed planting project in a couple of weeks. Well, I am very happy to report that after a little over a week, our seeds are sprouting like crazy! I couldn’t wait for two weeks to update you, I had to do it ASAP — check it out!!!

Broccoli Sprouts (1 week 2 days)

The broccoli was the first to show it’s leafy head. There are a bunch of sprouts. These aren’t actually in egg carton containers though, they are in a plastic container that my husband filled with the seedling soil. He sprinkled the seeds in and now we have enough plants for the whole neighborhood. The cucumbers, green onions, and basil are also in that container and doing rather well.

Green Onions (1 week 2 days)

The bush beans and bush peas are doing excellent! In fact we’ll probably need to plant them in the ground – or our raised bed – this weekend. Over the past couple of days they have really take off. I think it’s safe to say that we are off to a great start!

Bush Beans and Bush Peas (1 week 2 days)

The only thing I’m worried about now is getting them into the ground. As I mentioned before, we really need to plant the beans and the peas soon. They are busting out of the egg cartons. Hopefully, the weather isn’t too wet and cool for them. I guess we’ll see…

Are you starting a garden this year? How are your seedlings doing?

Brian
Brian

Brian is the founder of Kids Ain’t Cheap and is now sharing his journey through parenthood.

 
Email • Google + • Facebook • Twitter

Filed Under: Family Time, Green Living, Stuff to Do Tagged With: egg cartons, gardening, Seedlings

Garden Starts in an Egg Carton

April 8, 2011 | Leave a Comment

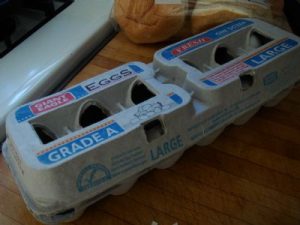
egg cartons make great garden starters
Photo by CAPL

In the post Spring Fever is Hitting; Time to Plant some Bulbs — I talked about the idea of using an egg carton to start bulbs. Well, I thought that was a fantastic idea and something the boys would really enjoy doing!

Every April, my husband and I start thinking about what we will be planting in our garden. We usually go to the store and buy seeds and starter kits. However, I’ve been trying to save egg cartons – since they always make for an easy and fun craft idea for the kids – so we had a few to spare, and decided to see if we could use them to start seeds sprouting.

Now — I’m not 100% sure this is going to work, since the starter kits we use are made of plastic but if can work for bulbs, it should work for seeds right? I guess you are going to have to check back to see if things are sprouting or not. I really hope they do, because the boys are so excited!!! We planted bush peas, bush beans, cucumbers, green onions, broccoli, and basil.

Getting started with planting seeds in egg cartons

We did buy seeding starter soil – which was a little more expensive than regular gardening soil – but I figured it might be work the extra $$. We let the boys spoon the soil into the egg cartons and they planted the peas and beans, since those seeds are big and easy for them to handle.

The boys added a little more soil after they put the seeds in, then they used a spray bottle to saturate the soil with warm water. After that, I loosely wrapped each carton in plastic wrap and put them in a warm spot. Now we just need to keep an eye on them, keep them wet and as soon as I see some little sprouts we’ll take them out for a little sunshine.

Check back in a couple of weeks to see what’s {hopefully} sprouting 🙂

Have you ever used egg cartons to start seeds indoors?

Brian
Brian

Brian is the founder of Kids Ain’t Cheap and is now sharing his journey through parenthood.

 
Email • Google + • Facebook • Twitter

Filed Under: Family Time, Green Living, Stuff to Do Tagged With: egg cartons, garden starts, gardening, seeds, spring

My Favorite Playdough Recipe

February 24, 2011 | 1 Comment

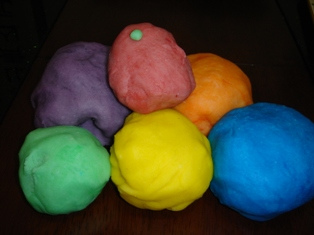
Homemade playdoughI am really not a fan of the play-dough you buy in the store. I find that it becomes crumbly, and makes a mess. I also don’t really care for the way it smells — but my kids love play-dough and can spend ridiculous amounts of time having fun with it. So of course, I really love it too.

I have tried a few play-dough recipes but they usually leave our hands smelling weird, and feeling dry from the salt that they contain. So, while my husband and I went away for a night, my Mom watched the boys. She told me about some play-dough she made and she thought the boys would really like it.

I was pleasantly surprised to discover that this play-dough, was the best in all the land (or at least I think it is).

The first thing I loved about it, is the consistency and the fact that after we play with it, it doesn’t leave our hands feeling like they are covered in gunk. The dough can make your hands a tiny bit greasy – but I’ll take that over dried out – anytime. This play-dough is stored in the fridge and I think that makes a big difference.

It smells absolutely wonderful, since it is made using Kool-Aid. This is one of my favorite things about it! I really haven’t had any problems with my kids trying to eat it, but I’m sure depending on the age of the child, this could make the play-dough all the more tempting to taste.

It’s also really simple to make. You know me — I love simple 🙂

Playdough recipe

Here is the recipe:

Ingredients:

  • 2 1/2 cups flour
  • 1/2 cup salt
  • 2 (4 g) packages unsweetened Kool-Aid powdered drink mix
  • 2 cups boiling water
  • 3 tablespoons oil

Directions:

  1. Mix flour, salt, Kool-Aid until blended.
  2. Carefully add oil to boiling water
  3. Add to the flour mixture and mix with spoon until cool enough to knead.
  4. Continue kneading until color is blended.
  5. Store in air tight bag or container in the refrigerator

My Mom said she was told that the purple and orange Kool-Aid makes the best dough as far as color but you can experiment. I think I may try blue next!

If anyone knows of a good flubber recipe I’d love to hear about it. That’s my next project!

Have you ever made playdough? What colors did you make?

Brian
Brian

Brian is the founder of Kids Ain’t Cheap and is now sharing his journey through parenthood.

 
Email • Google + • Facebook • Twitter

Filed Under: Family Time, Stuff to Do Tagged With: clay, Kool-Aid, playdough, Recipe

Happy Birthday Harrison!

February 20, 2011 | 5 Comments

dinosaur-cakeMy oldest son turns 5 tomorrow!  I can’t believe it’s been 5 years since we went into the hospital to have our first baby.  What a crazy whirlwind it has been since then.  I am so grateful and proud of my two little boys.  As with any parent, I have my moments of aggravation but the truth is, my boys are wonderful.  The problems we may run across day to day are normal an minor.  They are very sweet, very well behaved and I love them very much.  They have enriched my life far beyond what I could have expected.

Since his birthday is on a Monday, we had is party and celebrated his 5th birthday today.  Our little house was packed full of family and friends.  His favorite thing to eat is pasta so my wife made stuffed shells and her macaroni and cheese.  I got up early, got my smoker/grill fired up and made ribs.  Between that and the food that everyone else bought, everyone stuffed themselves happy.

A dinosaur cake

As I mentioned in my post about our recent trip to the Philly, Harrison Loves Dinosaurs.   He is completely obsessed with them and his favorite is Tyrannosaurus Rex.  It took a lot of effort but my wife made him an amazing T-Rex cake.  Harrison was blown away, as were the rest of us.


He got some really great presents (most of them dinosaur themed) and by the end of the day, him and his brother were exhausted from all the play time and excitement.  I must admit that my wife and I are also exhausted.  Our sparkling clean house is a disaster area after this party but both of us are enjoying some down time on the couch together.  We will will leave the mess until tomorrow.

Have you ever made a theme cake? How did it turn out?

Brian
Brian

Brian is the founder of Kids Ain’t Cheap and is now sharing his journey through parenthood.

 
Email • Google + • Facebook • Twitter

Filed Under: Family Time Tagged With: Birthday, Cake, Party

Our Trip to the Philadelphia Museum of Natural History

February 15, 2011 | 2 Comments

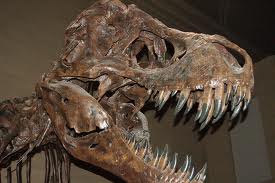
dinosaurs on display at the Museum of Natural historyMy oldest son, Harrison, turns 5 next week.  It’s really hard to believe that it’s been almost 5 years since our little Harry was brought into our lives.  What a crazy time that was and how quickly these past 5 years have gone.

Harrison is in full on dinosaur mode right now.  He is obsessed with them.  It’s all he talks about, all he wants to read about and all he plays with right now.  He has been begging us to take him to the museum ever since he found out that there was a place he could go to see dinosaur skeletons.  Philladelphia is only an hour and a half away from our house but with our tight budget, it wasn’t the easiest thing to plan but I was determined to take him for his birthday.

This Sunday, we packed the family up and went to Philly.  We didn’t tell the boys what we were doing or where we were going.  When we got their, it was all we could do to hold Harrison back while we got the tickets.  It was a great day and a memory I will cherish forever.

We saw and did a lot this past Sunday but I managed to capture a small piece of it with my digital camera.  Check it out below if you are interested!

Our family at the Philadelphia Museum of Natural History

Have you ever taken your kids to a museum? How did they like it?

Brian
Brian

Brian is the founder of Kids Ain’t Cheap and is now sharing his journey through parenthood.

 
Email • Google + • Facebook • Twitter

Filed Under: Family Time Tagged With: Dinosaurs, Museum, Philadelphia

« Previous Page
Next Page »
  • Facebook
  • Pinterest
  • RSS
  • Twitter
Best Parenting Blogs

Most Popular

Baby

10 Baby Names That Were Once Considered “Grandparent Names” but Feel Cool Again

Evan Morgan
Baby

9 Baby Names Inspired by Fall Without Naming Your Child Autumn

Evan Morgan
Baby

9 Baby Names That Sound Expensive Even Though Naming Your Baby Is Still Free

Evan Morgan
Baby names

Teachers Admit: These 6 Baby Names Create Instant Bias in the Classroom

Latrice Perez
6 Baby Names That Sound Cute Now but Cause Problems Later

6 Baby Names That Sound Cute Now but Cause Problems Later

Brandon Marcus

All content on Kids Ain’t Cheap is for entertainment purposes only. By reading this blog, you agree that Kids Ain’t Cheap is not responsible for any actions taken after reading this blog. For the full disclaimer, see our privacy policy.

Please note that Kids Ain’t Cheap has financial relationships with some of the merchants mentioned here. Kids Ain’t Cheap is funded by banner advertising, commission sales and search optimization consulting.

Copyright © 2006–2026 | District Media | All Rights Reserved | Privacy Policy

Copyright © 2026 Runway Pro Theme by Viva la Violette